
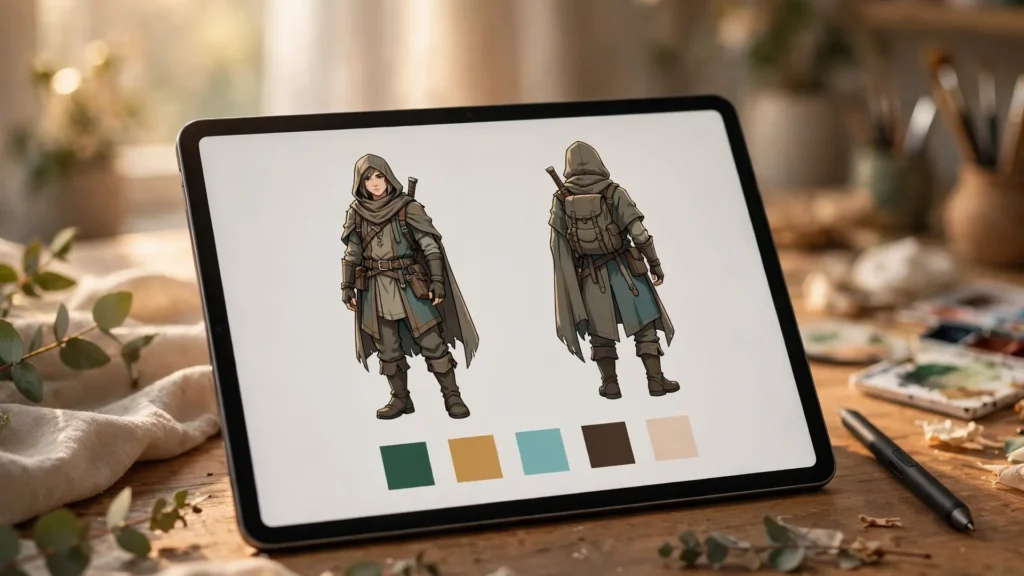
Most character sheets fail quietly. That’s the cruel part. They look great as a grid of images — moody light, interesting angles, real “concept art” energy — and then they fail at the one job they exist for: giving a video model an unambiguous answer to the question “who is this, exactly?”
The model squints at your artistic sheet, takes away a general impression, and spends the rest of the series improvising around it. A sheet is not there to inspire. It’s there to remove improvisation.
I’ve rebuilt my own character sheets several times. And every rebuild removed art and added information. What follows is the current standard I hold a sheet to before a character is allowed anywhere near a series: the views you need, the outfit panel done properly, the expression and hand panels everyone skips and regrets skipping, why the sheet itself must be shot in boring light, and how to test a sheet before it runs a whole production off a cliff.
A Sheet Is A Contract, Not A Mood Board
A mood board says “something like this.” A contract says “this, exactly, every time.”
Your video model is a contractor who will follow the contract precisely as well as it is written. And no better. Every ambiguity in the sheet becomes a decision the model makes for you, per generation, differently each time. The sheet’s job is to leave it nothing to decide about identity. Nothing. That’s the bar.
That framing changes what belongs on one. A working character sheet has three kinds of content:
- Identity views — the face and body from the angles the camera will actually use, rendered clearly enough that features can be checked against them later.
- Specification panels — the outfit itemised, the hair stated, distinctive marks shown, written out in words as well as pictures. Words on the sheet become the locked description string you paste into prompts.
- Performance panels — expressions and hands, the parts of a character that move and emote. Most sheets skip these. Most series suffer for it around episode two.
What does not belong: atmosphere. No rain, no neon, no dramatic backlight, no props from a specific scene, no costume changes. All of that belongs in shot prompts. The sheet is the one place in your project where nothing is “cinematic” — it’s a reference document, and reference documents should be as plain as a passport photo and for the same reason. The passport office doesn’t want your character study. Neither does the model.
If you already use reference images for consistency — and the reference images guide is the place to start if not — think of the sheet as the organised, complete version of that habit: not the one good still you found, but the full specification, built on purpose.
The Views: Front, Three-Quarter, Back, Full Body
Four views cover nearly every angle a series will throw at a character. Each one answers a question the others can’t:
- Front. The identity anchor. Face symmetric, eyes to camera, neutral expression. This is the frame that goes into the reference slot most often, and the one later shots get audited against. It should be framed head-and-shoulders as well as in the full-body version, because face detail is what close-ups live on.
- Three-quarter. The most-used angle in actual footage, and the one that reveals face structure — cheekbones, nose profile hints, jaw shape — that a flat front view hides. Characters generated only from front references often look fine head-on and wrong the moment they turn slightly. Why? The model never learned the face’s depth.
- Back. The view everyone skips and then needs in shot three. Hair from behind, the back of the outfit, anything worn or carried on the back. Walk-away shots, over-shoulder reverses, entrances — a series cannot avoid showing backs, and a model with no back reference invents one each time.
- Full body. Proportions, posture, the whole outfit head to shoes. This frame governs wide shots and keeps builds honest — height, build, how clothes hang. It doubles as the wardrobe reference frame for every full-body shot that follows.
Generate the views as one consistency problem, not four separate portraits. The reliable order: nail the front view first, review it hard, then derive the others from it — image-to-image or reference-driven generation with the approved front locked as the identity source. Four independently prompted portraits will give you four cousins. One portrait and three derivations give you one person from four sides.
On Seedance 2.5 the approved views can all ride as references together; the sheet also becomes your per-shot reference pack, which is the point of building it. Keep framing consistent across views — same scale, character centred, feet and head in frame for the full-body shots. A sheet whose views are framed identically is also far easier to eyeball for drift while you’re building it.
The Outfit Panel: Itemised And Colour-Locked
Next to the views, the sheet carries the outfit as a written panel — not a vibe, a list. Every garment, top to bottom, with colour, material and fit, plus the accessories and the deliberate absences. Like this: “Cropped black leather jacket, matte, silver zip, worn open. Plain white crew-neck t-shirt. High-waisted straight-leg blue jeans, no rips. White leather sneakers. No hat, no bag, no jewellery except a thin silver chain.”
See how specific that is? That’s the point. Three rules make this panel work:
- Itemise. If it’s worn, it’s listed. If it’s not listed, it doesn’t exist, and the prompt can say so. The model’s favourite surprise is the accessory nobody mentioned.
- Colour-lock with specific terms. Not “green” but “forest green”; not “white” but “off-white” if that’s the truth. The same words then travel into every shot prompt verbatim — the sheet is where your locked description string lives, so write it once, here, properly.
- Version the changes. A character with a second outfit gets a second panel, named (“Outfit B — evening”), with the same itemised rigour, and the shot list states which outfit each shot uses. Unmarked outfit changes are where “drift” comes from surprisingly often: the creator changed the clothes, the model split the difference.
I also note on the panel which single element is the character’s visual signature — the yellow raincoat, the red scarf. In review, that’s the first thing I check in any frame, because it’s the feature the audience uses to recognise the character at a glance, and it’s the canary for wardrobe drift generally.
Expressions And Hands: The Panels Everyone Skips
Here’s the part of the sheet that separates series that hold together from series that quietly recast themselves. Faces don’t just appear in footage; they perform. And hands don’t just exist; they hold, point, wave, fumble. If the sheet only shows a neutral face and no hands at all, the model invents the character’s smile, anger and grip fresh in every shot — and invention drifts.
The expression panel: a small set of the character’s core expressions — neutral, smile, serious or concerned, surprise, and the one or two emotional registers the story actually uses. Generate them from the locked front view, same framing, same light, and review them as a set. You’re checking two things: that each expression still looks like the same person (models love giving the smiling version a different face), and that the expressions are usable — a smile you’d accept in a close-up, not a grimace you’ll spend the series avoiding.
These frames become references for performance shots, and they also calibrate your prompts: after building the panel, you know which expressions this character survives well, and you can write scenes toward the model’s strengths rather than discovering them mid-episode.
The hands panel sounds excessive until the first time a character must hold the story’s key prop. Hands in generated video fail mostly at contact — gripping, holding, passing objects — and a character reference that includes hands at rest and holding a simple object gives the model proportions and skin tone to match against.
Include: hands relaxed at sides (usually already in the full-body view), and one frame holding a neutral object. It won’t make generated hands perfect — nothing does yet. It measurably reduces the “whose hands are those” mismatch where hands arrive with the wrong size, age or tone relative to the face. This matters doubly in product work, where the prop problem and the hand problem are the same shot.
While you’re at it: include a height or scale cue if the series has more than one character. A frame of the character beside a door frame, or both leads standing together, saves real pain later when two characters’ relative sizes start wandering between shots.
Clean Backgrounds And Honest Light
The sheet’s own rendering rules are dull and non-negotiable: plain light-grey or white background, flat even lighting, no colour cast, no dramatic shadow. I call it honest light — light that tells the truth about colours and materials.
Why so boring? A character sheet shot at golden hour bakes warm orange into the hair colour and the jacket’s dye, and the model will faithfully reproduce that baked-in warmth as if it were the character’s actual colouring, in every scene, forever fighting your night shots and office scenes.
Plain backgrounds matter for the same reason: anything behind the character in reference frames risks being learned as part of the character. A distinctive wall pattern, a plant, a window — models do occasionally carry background elements into generated scenes, and even when they don’t, a busy background makes the reference harder for both the model and you to read. When I audit a sheet, I want to see the character and nothing else competing for attention.
Resolution counts too. Build the sheet at the highest clean resolution your image step gives you, and keep the master files un-cropped. You’ll crop the face panel for one tool, the full-body for another, and re-crop when a tool changes its reference format. Masters stay whole; crops are disposable.
Testing A Sheet Before It Runs A Whole Series
The final step is the one that protects everything downstream: test the sheet before the series depends on it. A test is not “generate one nice shot.” It’s a small, deliberate stress test of exactly the situations the series will demand:
- The angle test. One shot each: front close-up, three-quarter medium, back view, full-body wide. Check each against its sheet view. Backs and three-quarters are where weak sheets confess.
- The expression test. Two shots: the character smiling mid-action, and the story’s heaviest expression. If the smile belongs to a stranger, the sheet’s expression panel needs regeneration before the series starts, not during episode three.
- The outfit test. A full-body shot in a different location and light than the sheet — outdoors if the sheet was neutral, evening if the sheet was bright. Confirm the outfit holds colour and shape when the scene’s light starts pushing on it.
- The second-character test (if applicable). Both leads in one frame, standing at their intended relative heights, doing nothing dramatic. Size and contrast problems announce themselves here, cheaply.
Judge the test shots at the framing and duration the series will actually use, and be honest: a sheet that needs its best angle to survive isn’t ready. Fixing the sheet at this stage costs an hour. Discovering its weaknesses at episode four costs the episode.
Each passed test shot also becomes part of the project’s approved reference pack, so the work isn’t thrown away — it accumulates into the consistency system the whole series runs on, the same system the QC checklist later audits against.
Build the sheet like a contract: identity views from every angle the camera will use, the outfit itemised and colour-locked in words, expressions and hands included because the story will ask for them, all of it in plain light on a plain background — then test it like you mean it. A series is a hundred small consistency decisions. A good sheet makes most of them before the first shot is ever generated.