
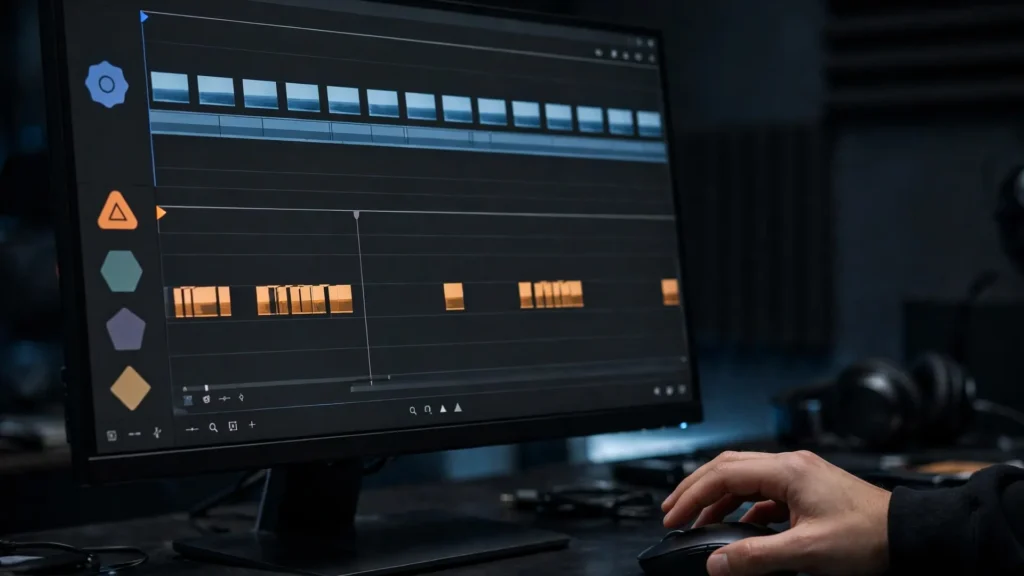
Your timeline is juddering and nothing is technically broken. One clip plays like silk. The next stutters as if frames are missing. A third looks oddly smooth in a way that makes faces feel like a soap opera. Welcome to mixed frame rates — the quiet chaos of AI video work, where one project can gather clips generated at several different frame rates, from different tools, in the same afternoon. Premiere Pro can handle all of it gracefully. But only if you make a couple of decisions deliberately instead of letting every clip negotiate with the timeline on its own terms. Left to negotiate, they negotiate badly.
Why Your Clips Disagree About Time
Traditional cameras agree about time because a production picks a frame rate and every device obeys. Generated clips obey nobody. Each tool has its own habits: one model hands you its output at one rate, another chooses differently, an upscaler or interpolator along the way may quietly change the rate again, and a screen-recorded or re-exported clip can arrive wearing whatever settings the last tool felt like using. It’s the wild west of timekeeping. Nobody’s in charge.
None of this is a defect in the clips. The trouble begins when they meet on a timeline running at yet another rate, and Premiere has to reconcile them in real time. A clip whose rate divides neatly into the timeline’s rate plays kindly. A clip whose rate doesn’t must have frames repeated or dropped in an uneven pattern — three frames shown, one skipped, two shown — and that unevenness is exactly the judder you’re seeing. Unevenness. That’s all judder is. Frames arriving off-beat.
- Mismatched sources: generations from Seedance, Veo, and other tools side by side, each with its own native rate. Nobody consulted anybody.
- Silent conversions: clips that passed through an editor, converter, or messaging app on their way to you and came out re-timed without mentioning it. Without a word. Rude.
- Interpolated guests: a clip that was frame-blended up to a higher rate before you received it, carrying a smoothness that doesn’t match its neighbours. Smooth in the wrong way.
The first skill is simply checking. In Premiere’s Project panel, the Frame Rate column tells you what each clip actually is — as opposed to what you assumed. Thirty seconds of reading that column explains most “weird motion” complaints we’ve ever chased. Thirty seconds! Most mysteries die in that column. For the upstream picture — choosing sensible rates at generation time — our guide to the AI video resolution and frame rates is the place to start. Start upstream. Life is easier there.
Choosing The Timeline’s Frame Rate
One rate rules the sequence. And choosing it is a delivery decision before it’s a technical one. Delivery first. Always delivery first.
Begin with where the video will live. The platform and format you ship to have their own expectations, and your timeline should be built at the rate you intend to deliver — so that what you watch while editing is the motion your audience will judge. Then look at your material: if most of the footage shares one native rate, the timeline bows to the majority, and the odd clips out are the ones that get converted. Majority rules. Minority gets converted. That’s the deal.
- Set the sequence rate from the delivery target first, the majority of your footage second, and any single favourite clip never. Never the favourite. The favourite doesn’t get a vote.
- Notice the arithmetic. Rates that divide cleanly into your timeline rate convert kindly; rates that don’t will always need more help. So favour timelines where your commonest source sits comfortably. Clean division is a gift. Take it.
- Commit early. Changing a sequence’s rate halfway through an edit re-times every cut, every caption, and every music hit. Pick before the rough cut, not during the panic after it. The panic after it is the worst time to make decisions.
For our short-form work the sequence is built for vertical delivery from the first minute — part of the setup laid out in editing AI clips in Premiere Pro — and generation prompts are written to feed that rate wherever the tools allow. Wherever they allow. Sometimes they don’t. That’s what the rest of this article is for.
Interpreting Footage Without The Judder
Premiere gives you a proper tool for this and buries it in a right-click: Interpret Footage. It lets you tell Premiere to treat a clip as if it were a different frame rate. Used well, it’s the cleanest fix in this entire article. Used carelessly, it changes a clip’s speed and duration — which surprises people. Surprises them mid-edit. Don’t be surprised. Read this first.
Understand what it does. Interpreting doesn’t invent or discard frames; it re-labels them. A clip interpreted to a lower rate plays slower and longer; to a higher rate, faster and shorter. So interpretation is the right medicine when a clip’s rate is a labelling accident — the frames are fine, the label is wrong — or when a gentle speed change is honestly what the shot wants anyway. Right medicine, right patient. That’s the whole game.
- The wrong-label case: a clip that plays at an odd speed until interpreted to the rate it was clearly generated at — at which point motion and duration both come home. This happens more often than anyone admits after files pass through converters. Converters lie about labels. Interpreters correct them.
- The deliberate retime: interpreting a higher-rate clip down to the timeline rate yields honest slow motion, real frames all the way, no invention. If you generated at a higher rate with this in mind, congratulations — you shot your slow motion properly. Properly! On purpose!
- The trap: interpreting a low-rate clip up to the timeline rate does not add frames. It just plays the same frames faster. If you need those moments at normal speed, you need interpolation or a different shot — not a label change. A label change is not magic. It can’t create frames.
Where interpretation doesn’t fit, the alternative is letting Premiere conform the clip to the sequence rate by repeating or dropping frames. For small mismatches and fast, busy material, that can look perfectly fine. For slow pans and faces, the uneven cadence shows — and that’s when the next tool earns its place. Every tool has its moment. This one’s coming up.
Optical Flow: When It Helps, When It Smears
Optical Flow is Premiere’s way of inventing the frames a mismatch threw away: it analyses the motion between real frames and synthesises new ones in between. When the motion is simple and clean, the results can be genuinely beautiful — a smooth pan rescued, a gentle movement made continuous at a rate the source never offered. Beautiful is the right word. It can be that good.
And when the motion is complicated, Optical Flow guesses. Visibly. Faces in conversation, hands crossing, fine patterns, text, anything moving in contrary directions inside one frame: these are where invented frames bend, melt, and swim. If you’ve seen a mouth warp mid-word while the rest of the clip played beautifully, you’ve met this boundary personally. Everyone meets it eventually. It’s a rite of passage.
- Apply it per clip, where the judder actually is, rather than across a whole sequence as a seasoning. Seasoning ruins dishes. Precision fixes shots.
- Check the busiest second of the clip at full size before approving, not the calm opening frames. Optical Flow failures hide in calm footage and confess in busy footage. Go where it’s busy. That’s where the truth is.
- If it smears, shorten its duties: conform the simple sections, cut around the complex ones, or accept a straighter conversion for that shot. A slight judder reads as texture; a melting face reads as a mistake. Texture is fine. Mistakes aren’t.
- Render the section properly before judging. Preview playback flatters interpolation in ways the export won’t. The export is the truth. Always judge the export.
This is the timeline-side sibling of generation-side interpolation, and the two pair well with the thinking in our guide to frame interpolation for AI video — where interpolation happens matters less than whether the motion in front of it is honest. Honest motion interpolates well. Dishonest motion melts. Simple as that.
Delivery Rate Vs Working Rate
Two rates live in every project, and confusing them causes a special flavour of sorrow. A very specific, very avoidable sorrow.
The working rate is your sequence rate while editing: the cadence your cuts, captions, and music hits are timed against. The delivery rate is what the export carries to the platform. When they match, life is simple and the edit you approved is the edit people see. When they differ, the export performs one last conversion on the entire finished video — every carefully judged motion re-sampled at the finish line. After all your careful work. One last spin of the wheel.
Sometimes a difference is unavoidable or even sensible. Archival or client material may dictate a delivery rate your working footage doesn’t share, and finishing at a master rate before converting for several destinations is a respectable plan. But it should be a plan: convert once, at the end, with eyes open, and watch the delivered file all the way through. Eyes open. All the way through. No skipping.
What we avoid is accidental difference — a sequence built at one rate out of habit and exported at another out of a preset’s habit. Check the export settings against the sequence like you check the spelling of a name. Members of every post-house in history have shipped the wrong rate; the ones who shipped it twice are the ones who built the check into a final-pass list. Which is honestly where it belongs. On the list. Next to everything else you check.
Normalising On Import: The Habit That Prevents All Of This
Almost everything above becomes a minor chore instead of a recurring mystery if you normalise at the door. When clips arrive in a project, they get sorted before they get edited. Sorted. Before. It’s a small ritual with an enormous payoff.
- Read the column: on import, check the Frame Rate readout for every clip and bin them by rate. The odd ones announce themselves immediately instead of ambushing the timeline later. Immediate announcement beats later ambush. Every time.
- Decide per family: for each minority rate, choose then and there — interpret, conform, or plan an Optical Flow pass — and note it on the bin so the decision survives a long edit. Decisions written on bins survive. Decisions in heads don’t.
- Convert the hopeless cases outside the timeline: a clip that needs heavy help is better converted into a clean, timeline-rate file before the edit than re-processed at every preview and export. Do the heavy lifting once, outside, in peace.
- Prompt for the timeline next time: where your generation tools let you steer output, ask for the rate the sequence wants. Every clip that arrives already agreeing is a clip you never have to fix. Never. That’s the dream.
It takes minutes per project. It saves the strange afternoon where three shots judder for three different reasons and none of the fixes match. Organisation is rarely the glamorous part of editing — and it is very often the difference between finishing and troubleshooting. Finishing is better. Trust us on this one.
Frequently Asked Questions
Why Does One Clip Judder On My Timeline While Others Play Smoothly?
That clip’s frame rate most likely doesn’t divide evenly into your sequence rate, so Premiere repeats and drops frames unevenly. Check its rate in the Project panel, then decide: interpret it if the label or a speed change suits, conform it if the mismatch is small, or use Optical Flow on the sections where the judder shows. Diagnose first. Prescribe second.
What Frame Rate Should My Premiere Sequence Be?
Start from your delivery target — the rate you intend to export for the platform — then favour the native rate most of your footage shares. Set it before you start cutting; changing a sequence rate mid-edit re-times every cut and caption. Before. Not during. Before.
Does Interpreting Footage Change A Clip’s Speed?
Yes. Interpreting re-labels frames rather than adding or removing them, so a clip interpreted to a lower rate plays slower and longer, and to a higher rate, faster and shorter. That makes it perfect for mislabelled clips and for honest slow motion from higher-rate sources — and the wrong tool when you need new frames at the same speed. Right tool, right job.
When Should I Use Optical Flow On Mixed Frame Rates?
Use it where an uneven conversion is visible and the motion is simple enough to synthesise: smooth pans, gentle movement, clean subjects. Preview the busiest moment at full size and render before approving — because faces, hands, text, and crossing movement are where invented frames tend to smear. Simple motion: yes. Faces melting: no.
One Timeline, One Clock
The mindset shift underneath all of this is simple enough to say and satisfying to practise: a timeline can only keep one time. Every clip that joins it either agrees with that time naturally, or gets helped into agreement by a decision you made on purpose. Naturally or deliberately. Those are the two options. There is no third option where it just works out.
Make the decision early, at import, with the frame-rate column open and the delivery target in mind. After that, mixed sources stop being a source of mysterious stutter and become what they really are — just footage, from several places, all keeping the same clock under your direction. Your direction. One clock. That’s the whole article, really.