
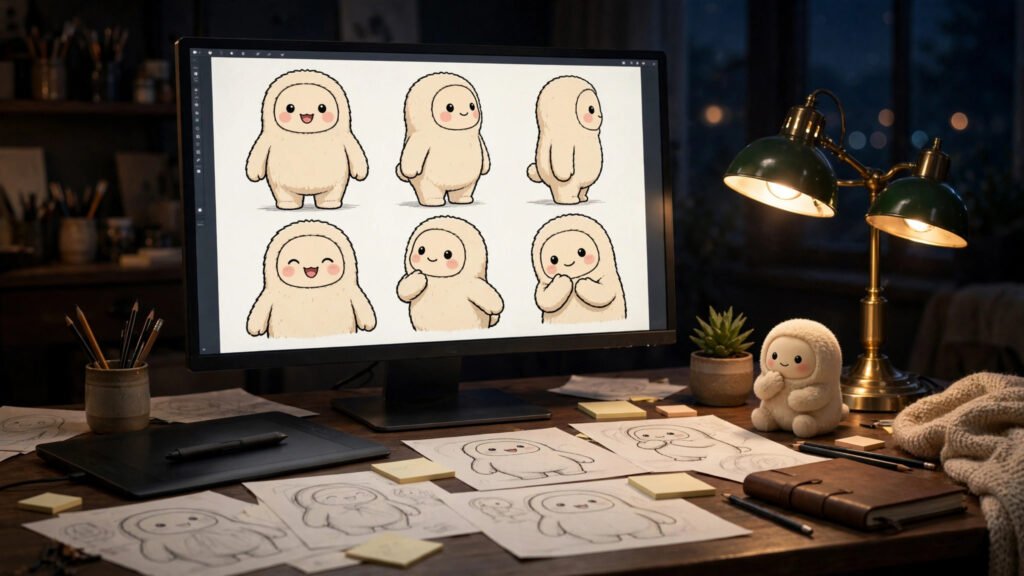
Why One Reusable Character Changes Everything
My first month of AI video was a parade of strangers. Every video had a different face — different hair, different jacket, different everything — because I typed a fresh description into the prompt box each time and let the model improvise. Nobody watching could tell my videos came from the same creator. Looking back, I’m not surprised nothing got traction. I was asking viewers to bond with a new person every fifteen seconds.
The fix was embarrassingly simple: design one AI video character, once, and reuse it in everything. Same face, same outfit, same look, every video. The first time I posted three videos in a row with the same character, comments started saying things like “the robot kid is back.” That’s the moment it clicked. A reusable character turns scattered clips into a series, and a series is what people follow.
There’s a workflow payoff too. Once the character exists as a set of reference files, every new video starts from something proven. You stop re-describing hair, eyes, and clothing in every prompt. You stop getting ambushed by a face that morphed halfway through a scene. If your early work feels inconsistent, a missing character is usually the reason — random faces are one of the classic problems I covered in why your first videos look bad.
Pick the Right Kind of Character First
Not every character type is equally beginner-friendly. Here’s what I’ve learned from testing all of them:
Stylized characters are the easiest win. A cartoon robot, a friendly monster, a simple mascot-style figure — bold shapes, flat colors, one signature feature. Stylized designs forgive small inconsistencies because the audience isn’t comparing them to a real human face. My robot kid worked because a glowing visor is either there or it isn’t; there’s no uncanny valley to fall into.
Animals sit in the middle. A fox with a red scarf, a chubby cat with oversized goggles — animals read clearly and travel well across scenes. Fur detail can drift between generations, but a strong color hook keeps the identity readable.
Photorealistic humans are hard mode. Real faces are where viewers notice every tiny change: slightly different eyes, a shifted jawline, and suddenly it’s a different person. I’m not saying don’t do it — but if this is your first character, start stylized, learn the workflow, then attempt photoreal later when you know how to lock a face down.
Whatever you pick, keep the design simple enough to describe in one sentence. Complexity is the enemy of consistency.
What You’ll Need
You need three things, and you probably already have two of them:
- An AI character generator for the reference art. Any image model you like — I use Midjourney because its character reference feature (
--cref) was built exactly for this job, feeding a reference image back in to hold a face steady across new generations. DALL-E or any other generator works the same way for the basic workflow. - A video generator with image-to-video. Seedance 2.5, Veo, Runway, Pika, or Luma — all of them accept a starting image. Image-to-video is the engine of this entire workflow: your character reference image goes in, and the face carries into the moving shot.
- One folder named after your character. Every reference file lives here. It takes thirty seconds to set up and it is the difference between a reusable asset and a pile of lost downloads.
The 7-Step Workflow
This is the exact process I run for every new character. First time through, budget about an hour — most of it spent picking the right hero image. Your second character will take twenty minutes.
- Step 1 — Lock the concept in one sentence. Before opening any tool, write a single sentence: who the character is, roughly how old they look, and one visual hook. Mine was “a cheerful robot kid with a round head and a glowing blue visor.” The hook matters more than the rest — a visor, a hat, a color. It’s the anchor your eye recognizes instantly, and it’s what the AI will hold onto. If you can’t fit the character in one sentence, simplify the design before you generate anything.
- Step 2 — Generate the hero character reference image. Prompt your image generator for a clean, front-facing portrait on a plain background. The plain background matters: it keeps the model focused on the character instead of inventing scenery that gets baked into the “identity.” Generate four variations and pick the one with the clearest, most readable design. Bold shapes, one or two signature colors, readable at thumbnail size. Save the winner as hero-reference.png. This single file is the most important asset you’ll make this month.
- Step 3 — Build a simple turnaround sheet. Generate the same character in three more views: three-quarter, side profile, and back. In Midjourney, feed your hero image back in with
--cref— it anchors the face while the angle changes. The--cwparameter controls how strictly it follows the reference; I keep it at 100 for turnarounds. Four views together form your character sheet, and it’s what stops the “morphing face” problem when your character turns its head on camera. One front view alone is never enough. - Step 4 — Add expressions and one action pose. Using the same character reference, generate three expression shots (happy, surprised, serious) and one full-body action pose. You don’t need a professional animation model sheet — these five or six images give you a visual vocabulary to reach for whenever a video needs a specific mood. Save them all in the character folder with clear names.
- Step 5 — Name your character and write the descriptor block. Give the character a name, then write a fixed description — 40 to 60 words covering face, hair or head shape, outfit, colors, and art style. Save it as a text file next to the images. This paragraph gets pasted into every video prompt, word for word, forever. Identical wording is the whole trick: consistent language produces consistent output. File everything properly — a clean folder system is what keeps a reusable character reusable instead of lost somewhere in your downloads.
- Step 6 — Test it in a real video. Load your hero reference into your video generator’s image-to-video mode and prompt a simple five-second shot: the character waving at the camera. Watch the result like a hawk. Does the face hold? Do the signature colors survive the motion? If anything drifts — the visor changes shade, the head shape warps — go back and regenerate that reference image before building on it. A broken foundation poisons every video that follows.
- Step 7 — Archive versions, never regenerate from scratch. Save the finished set as version 1. When you tweak the design later, save a new version folder instead of overwriting. If the new look doesn’t work, you roll back in seconds. From this point on, every video starts from these files. No more random faces, ever.
Keeping Your Character Consistent Across Videos
Having the files is half the job. Using them the same way every time is the other half. This is how I keep a consistent AI character looking like itself from video one to video fifty:
Always start from the character reference image, not from text. Image-to-video with your hero reference beats a text-only prompt every time. The model is matching pixels instead of interpreting adjectives, and pixels don’t get creative. I use the text prompt for the action and the scene — the character itself rides in on the image.
Paste the descriptor block verbatim. Never paraphrase it per video. “Glowing blue visor” in one prompt and “bright cyan face screen” in another reads as two different features. Copy, paste, don’t improvise.
Change one thing at a time. New outfit? Regenerate the reference set, check it, then use it. Swapping descriptors mid-project is how characters quietly drift into strangers over a few videos.
Note the seed when the tool offers one. Some generators let you lock a seed number so a prompt reproduces the same result. I jot the seed next to any reference image I love. Not every tool exposes this, so treat it as a bonus, not a requirement.
Do a face check on every final render. Before a video goes out, I freeze one frame and hold it next to the hero reference. Thirty seconds, and it catches drift early — when it’s still cheap to fix.
Mistakes I See Beginners Make
- Designing too much detail. Tiny logos, intricate tattoos, complex fabric patterns — fine detail is the first thing AI mangles. Bold and simple survives generation; fussy doesn’t.
- Skipping the turnaround. A front view alone can’t survive a head turn. The moment your character looks sideways, the model guesses — and guesses wrong. Four views minimum.
- Regenerating the character for every video. This is the exact habit this workflow exists to kill. The character is designed once. Everything after that is reuse.
- Rewriting the descriptor “to keep it fresh.” Freshness belongs in the story, the scene, and the action — never in the character’s face. Your character is the constant; everything else is the variable.
- Using a busy hero reference. A detailed background in the reference image can get baked into the character’s identity. Plain background, always — you can see the rule working in step 2.
- Testing with a complicated first shot. Your test video should be boring: a wave, a head turn, a smile. If the character can’t survive boring, it won’t survive a fight scene.
Your Next Move
You now own a reusable AI video character: a named concept, a reference image set, a fixed descriptor block, and a test video proving it holds up in motion. The next step is putting that character to work in a real story — here’s how I turn an idea into a 15-second script built around a single character. And if your first finished videos still feel off, this breakdown of why early videos look rough will show you exactly what to fix next.