
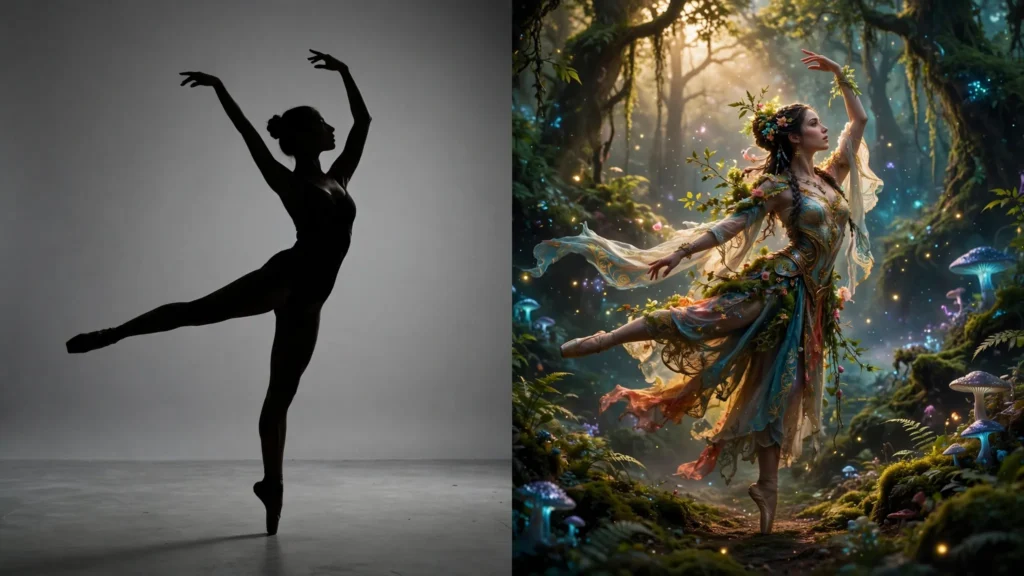
Some Movements Can’t Be Described in Words
A specific shoulder roll before a turn. The exact hand path of someone tying a knot, flipping a coin, or pushing open a door. A dancer’s weight shift in the half-beat before the drop.
You can spend three paragraphs describing that in a prompt and still get mush. Text is a terrible medium for movement. The model has to guess what you mean, and movement is where guessing shows.
That’s the problem motion transfer solves. Instead of describing the movement, you show it. Record a video of someone doing the thing — dancing, walking, gesturing — and hand that to the AI. The model studies the motion in your clip and applies it to a character, a scene, or a stylized figure of your choice.
It’s not a trick or a hack. It’s one of the most reliable ways to get believable human movement out of AI video right now.
What Motion Transfer Actually Is
At its core, motion transfer separates two things that used to be glued together: what the character looks like and how the character moves.
You provide the look — a character image, an AI-generated figure, a stylized persona. You provide a separate video for the movement — a dancer doing choreography, yourself waving, a clip of someone walking down a street. The AI combines them: your character performing that exact motion.
This is fundamentally different from text-to-video. With a prompt, you’re asking the model to invent movement from scratch. With motion transfer, the movement already exists — the model just has to reproduce it. Reproduction is far easier than invention, which is why the results look so much more natural.
What’s Happening Under the Hood
Most motion transfer tools work in two stages. First, the system analyzes your reference video and extracts the movement — tracking joints, body position, timing, and rhythm frame by frame. This is pose estimation: the model builds a simplified skeleton of the person in your clip.
Second, it maps that skeleton onto your target character. The skeleton drives the character’s body like a digital puppet. Facial details, clothing, and background are synthesized around that motion.
None of this requires you to understand the math. But knowing it helps you shoot better reference videos, because you start thinking like the pose tracker: can the model actually see my elbows here?
The Tools That Do It Best
A few platforms have made this their entire identity, while others offer it as one feature among many.
Viggle — The Motion Transfer Specialist
Viggle is the name that comes up first for a reason. Its Mix feature is the classic motion transfer workflow: upload a character image, upload (or pick) a motion video, and the character performs that motion. Pick a dance template from the library, drop in your character, done.
The Move feature does the same thing while keeping the original background — useful when the setting matters, not just the character. Multi-Track handles scenes with multiple characters, each keeping their own identity while moving together.
Things worth knowing about Viggle:
- Clips are short — roughly 4 to 15 seconds per generation. This is a short-form tool, not a long-scene generator.
- The free tier works but carries a watermark. Clean, higher-volume output needs a paid plan.
- Templates are the fastest path. Thousands of pre-made motion templates exist, from subtle gestures to full choreography.
- Character consistency is one of its strengths — the same character stays recognizable across repeated generations.
Runway Act-One and Act-Two — Performance Capture
Runway approaches this from the performance angle. Act-One takes a “driving video” — a close-up of someone speaking or emoting — and a character reference image, then animates the character with the micro-expressions, eye lines, and head movements of the original performance. It’s built for dialogue-heavy, head-and-shoulders shots.
Act-Two, released in mid-2025, expanded this to the full body: face, body, and hands from a single webcam performance. That opened up full physical performance instead of just talking heads.
The honest limitation: Act-One is strongest on faces. Full-body action capture gets less consistent, and for stunt-level or complex choreography, traditional tools or specialized mocap setups still win.
Kling Motion Control 3.0 — Reference-Driven Scenes
Kling’s Motion Control applies motion from a reference video onto a static character image, outputting at 720p or 1080p. Its real strength shows when one motion reference needs to drive several different characters or art styles — shoot the movement once, apply it to anything.
Where This Fits Your Workflow
If your content is character-driven short-form video — dances, skits, dialogue scenes — motion transfer belongs at the center of your process, not the edge. It’s the difference between fighting the model for every movement and directing it.
How to Shoot a Reference Video That Actually Works
Here’s the part nobody explains: the reference video matters as much as the tool. Garbage in, garbage out. The model can only transfer motion it can clearly see.
Framing
Keep the full body in frame if the motion involves the full body. Sounds obvious, but people constantly shoot reference clips where the feet get cut off, then wonder why the output has a floating torso. If only the upper body matters (a talking-head or gesture scene), frame from the waist up — but commit to one framing per clip.
Lock the camera. No panning, no handheld shake, no zooming mid-clip. A tripod, a stack of books, a phone leaned against a wall — anything that holds still. Camera movement in the reference becomes noise the model has to untangle from the body movement.
Background and Lighting
Plain background. A blank wall beats a busy room every time. The pose tracker needs to separate your body from everything behind it, and clutter makes that job harder. If you have a green screen, great. If not, a plain light-colored wall works fine.
Light yourself evenly. Strong backlight turns you into a silhouette, and silhouettes have no trackable detail. Face a window or a lamp. You don’t need studio lighting — just don’t be a shadow.
Wardrobe
Wear fitted clothes in a color that contrasts with the background. Baggy clothing hides the joints the model is trying to track — sleeves that swallow your elbows, pants that blur your knees. The model doesn’t know where your arm ends if your arm is a shapeless blob of fabric.
The Performance Itself
Move cleanly. Sharp, deliberate movements transfer better than loose, improvisational ones. If it’s a dance, do the actual choreography at full commitment — half-energy reference clips produce half-energy output. Hold the starting pose for a beat before moving, so the model has a clear read on the rest position.
And keep it short. Most tools work in the 4–15 second range anyway. One clean move beats a 30-second routine full of transitions the model will smear together.
The Workflow, Step by Step
Here’s how a typical motion transfer session runs:
- Prepare your character. Generate or upload a clear, front-facing character image. Good lighting, clean background, full body visible if the motion is full-body. This is what will be moving — make it a good source image.
- Get your motion. Either shoot your own reference video following the rules above, or pick a template from the tool’s library. Templates are faster; your own footage gives you exact control.
- Upload both. Character image plus motion video. Most tools ask for these two inputs and nothing else at this stage.
- Set your options. Background choice (keep original, plain white, green screen for compositing later), quality tier, clip length. Don’t overthink this on the first pass — generate, look, adjust.
- Generate and review. Watch the output specifically for hands, feet, and face. These are where transfer breaks down first. If the body motion is right but the hands glitch, that’s usually a reference-video problem (hands moved too fast or were occluded).
- Iterate on the reference, not the settings. When output looks wrong, the instinct is to tweak tool settings. Nine times out of ten, re-shooting the reference with cleaner movement fixes more than any slider will.
- Composite and finish. If you generated on a green screen or plain background, bring the clip into your editor and composite it into your scene. Color grade to match your other footage — AI output and the rest of your video often need different grades to sit together naturally.
Common Mistakes
Shooting the reference in a messy room. The number one cause of bad transfers. The model tracks your roommate walking past the window instead of your arm.
Motion too fast for the clip length. Rapid spins and quick direction changes smear. The model has limited frames to work with — fast motion eats frames. Slow it down in the reference; you can speed up the output in editing.
Mismatched body types between character and performer. A tall dancer’s motion mapped onto a short, stocky character will look off in the proportions. It’s not a dealbreaker, but matching roughly similar builds gives cleaner results.
Expecting long scenes. Motion transfer is a short-clip technique right now. Plan your content around 4–15 second beats, not continuous minutes.
Skipping the review pass. Always watch the full output before publishing. Transfer artifacts cluster at the start and end of clips, where the model is blending into and out of the motion.
The Limitations, Honestly Stated
Motion transfer is powerful, but it has edges.
Hands remain the weak point. Fast hand movements, fingers crossing, hands passing behind the body — these glitch more than anything else. Choreograph around it when you can.
It reproduces, it doesn’t interpret. If your reference performance is flat, the output is flat. The AI won’t add charisma your reference didn’t have.
Facial nuance varies by tool. Full-body transfer tools are often weaker on faces than dedicated performance-capture features like Act-One. For dialogue scenes, use the right tool for the job.
Identity drift on long loops. Applying the same character across many generations can introduce small changes in appearance. Tools with character-consistency features handle this better, but it’s something to watch.
It’s not mocap-studio quality. For professional VFX pipelines, dedicated motion capture still wins on precision. Motion transfer is a creator’s tool — fast, accessible, and good enough for content that ships.
Where to Start
If you’ve never done this before, start with a template. Pick a dance or gesture template in Viggle, upload any clear character image, and generate. You’ll have a result in about a minute, and you’ll immediately understand what the technique does — and what your own reference footage needs to look like.
Then shoot your own reference. One movement, plain wall, locked camera, clean clothes. Compare the output to the template version. That comparison teaches you more about directing AI motion than any tutorial.
Movement is the hardest thing to describe and the easiest thing to show. Motion transfer is just the tools finally catching up to that fact.