
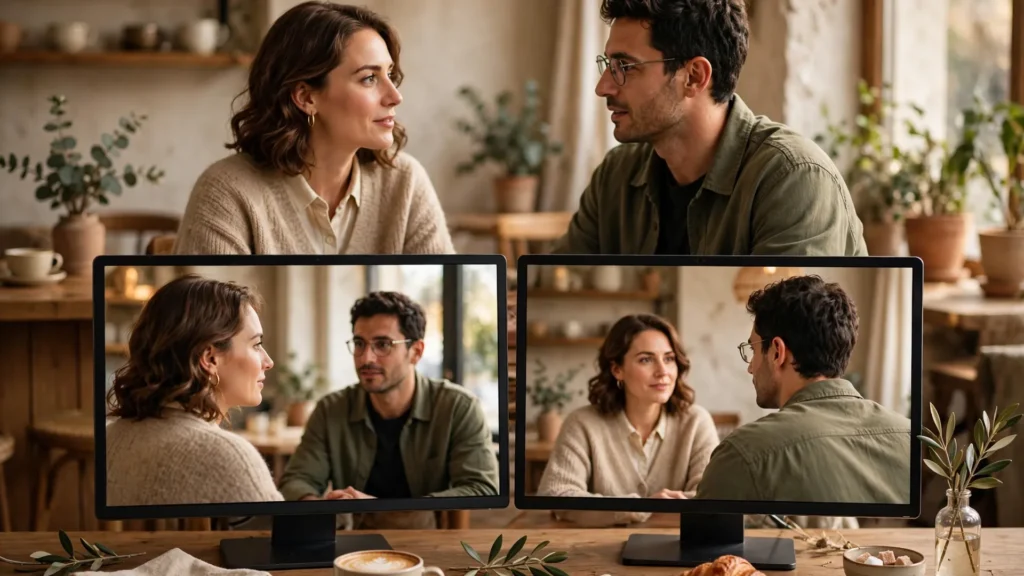
Here’s a strange thing about AI video. You can generate ten technically clean shots of a conversation, cut them together — and produce a scene that feels subtly drunk. Nobody crosses a line you can point at. Nothing flickers. But the two characters seem to be talking past each other. The walk across the room goes nowhere. And the viewer’s sense of where anyone is keeps dissolving. What you’re feeling is broken screen direction and broken eyelines. The oldest continuity rules in filmmaking. And the ones generative tools break most casually.
Traditional crews protect these rules with a script supervisor, marks on the floor, and a hundred years of habit. You have a prompt box. The rules still apply to your footage, though — because they’re not really rules about filming. They’re rules about how viewers build a mental map of a scene. This guide covers the ones that matter, why generated shots violate them so easily, and how to plan and fix direction without regenerating your whole scene.
The Invisible Rules Your Viewers Still Feel
Screen direction is the simple agreement that things keep moving the way they were moving. A character walking left-to-right in one shot continues left-to-right in the next, and the audience reads it as the same journey. Flip the direction without showing a turn, and the audience reads a return trip — or just confusion. Eyelines are the companion rule: when a character looks off-screen, the next shot should show what they’re looking at, positioned so the gaze lands naturally, and a character they’re talking to should appear to be looking back at them. Simple on paper. Easy to forget at generation time.
Nobody teaches audiences these rules. They absorb them from a lifetime of watching edited video — the way you absorb grammar. That’s why violations feel wrong rather than look wrong. A viewer will say a scene is “confusing” or “amateur” without ever naming the crossed line. For AI creators this cuts both ways. Your audience won’t forgive the error because a model made the footage. But they also won’t name it — so it never shows up in comments as anything fixable. It just quietly lowers how professional the work feels.
The core concepts you actually need are few:
- The line (or axis). An imaginary line through the action — between two people talking, or along a path of travel. Camera setups on one side of it produce matching directions; crossing it flips them.
- Direction of travel. Pick a screen direction for a journey and keep it until the character is seen to turn or arrive.
- Matching eyelines. In shot/reverse-shot conversation, the characters’ gazes should meet: one looks screen-right, the other screen-left, at compatible heights.
- Entrances and exits. Leave frame on one side, enter the next shot from the opposite side. Exit right, enter from left — the journey continues. Exit right and enter from right and the character has apparently turned around off-screen.
That’s genuinely most of it. The craft is in getting generated clips — each made in isolation, each with no idea where the camera “really” is — to honour agreements they know nothing about.
Screen Direction: Left, Right And The Lie Of The Flip
Why do models break direction so often? Because nothing in a text prompt like “a woman walks through the station” specifies a direction. And the model’s default is whatever composition looked good in its training examples. Generate the next shot — “she continues through the station” — and the default re-rolls. Half your shots walk one way, half the other, and the sequence reads as pacing. Not a journey. Pacing.
The fix at generation time is to treat direction as part of the shot’s spec. Stated plainly. Consistently. Every time:
- Say the direction in the prompt. “Walking from screen left to screen right” — crude, explicit, effective. Models respond to it far more reliably than to implied direction in scene descriptions.
- Keep a direction column in your shot list. For every moving shot, one note: L→R or R→L, decided when you plan the sequence, not when you prompt. Direction decided per-shot, in the moment, will contradict itself by shot four.
- Use landmarks to carry direction. A character passing the same distinctive feature — the red door, the ticket gate — in the same screen direction across shots reinforces the journey more strongly than body movement alone. This ties into keeping locations consistent: stable geography and stable direction are the same discipline seen from two sides.
And the flip: yes, you can mirror a shot in the edit, and sometimes it’s the perfect rescue — a walk that came back backwards flips into correctness. But the flip lies, and the lie has a paper trail. Text and logos reverse — that station sign now reads backwards. Asymmetric details swap sides: the bag that was on the left shoulder, the parting in the hair, the watch on the wrong wrist, a scar on the wrong cheek. Cars change which side the driver sits on. So flip only when the shot is clean of readable text and strong asymmetries, and check the flipped frame against your character’s locked features before committing. A flip that saves the direction and breaks the wardrobe has traded one continuity error for another.
Eyelines In Generated Conversations
Conversations are where AI footage most needs eyeline control — and least reliably delivers it. Generate an over-the-shoulder shot of Maya talking, then generate Daniel’s reverse, and you’ll regularly get Daniel looking at the camera, at the ceiling, or serenely past Maya’s supposed position at nothing at all. The shots are individually plausible. Together? Nobody is talking to anybody.
What controls eyelines in practice:
- Prompt the gaze target and height. “Looking slightly down and to screen left, as if at a seated person” beats “talking to a friend.” Height matters: if one character is standing and the other seated, the standing character’s gaze must angle down or the pair will never connect. Decide who is higher in the scene and write it into both prompts.
- Use image-to-video for the reverse. The most reliable eyelines I get come from building the reverse shot as a still first — where I can choose or generate a frame with the gaze exactly right — then animating it. A locked first frame locks the gaze direction for the whole clip. This is the same reason hero faces work better from stills, covered in the text-to-video vs image-to-video comparison.
- Keep the pair’s screen sides sacred. Maya on the left looking right; Daniel on the right looking left. It sounds obvious until a generation places Daniel on the left too, and now both characters look the same direction like they are watching a tennis match. Check sides on every take before accepting it.
- Let single shots breathe. Not every line needs a reverse. A held shot on one character while the other speaks off-screen has no eyeline to break, and it rests the audience. Over-cutting between two generated faces doubles your eyeline risk per line of dialogue.
A review habit that helps: watch the assembled conversation once with the sound off. Just the eyes. Sound-off removes the dialogue that normally papers over gaze problems — and a conversation that still reads, with glances meeting and reactions timed, is a conversation that works. Try it. It’s revealing.
Planning Direction On The Storyboard
Direction is nearly free to fix at the storyboard stage and expensive to fix after generation. On paper (or in your planning doc), the room exists once — drawn from above if needed: where the door is, where the lamp is, which way the character travels, where each conversationalist sits. Every frame drawn from that map inherits consistent direction automatically. The map does the work so you don’t have to.
My storyboard frames carry three tiny marks beyond the picture: a direction arrow on any moving subject, a note of the character’s screen side, and an eyeline note for dialogue frames (“Maya → looks R, slightly down”). Thirty seconds per frame while planning. Saves the most tedious regeneration loop in the whole process. This is a core part of the storyboard-first workflow — the storyboard isn’t just pictures of the shots, it’s the scene’s geography contract, and generation is just executing it.
For complex scenes — a chase through rooms, a conversation that becomes a walk — break the movement into legs and give each leg its own direction decision, joined by a neutral shot: a frontal or overhead frame, a close-up, a detail insert. Neutral shots are the editor’s reset button. They let direction restart without the audience noticing. Film editors have used them forever. And in AI work, where any single shot may come back unusable, planning a couple of neutrals is also insurance.
Vertical video deserves a specific mention here, because most AI series work now ships in 9:16. The narrow frame hides less. In a wide 16:9 frame, a character can cross the screen over several seconds and the journey registers clearly; in vertical, the same crossing is over in a blink, and characters spend far more time near the frame’s centre, where direction cues are weakest. So two practical adjustments. First: eyelines carry more of the load in vertical. With less room for travel, gaze direction becomes the main geography signal — so the sound-off eyes-only review matters even more. Second: entrances and exits should be more deliberate. A character entering from frame-left in vertical reads as an event, and the next shot’s exit side genuinely has to match it, because the audience had fewer other cues to track. If your series is vertical-first, draw the storyboard in vertical frames too. Direction decisions made in landscape frames quietly change meaning when the sides get cropped away.
Fixing A Crossed Line Without Regenerating Everything
Despite all that planning, you’ll assemble a scene one day and find the line crossed right at the emotional peak. Before regenerating, work the repair ladder:
- Insert a neutral. A close-up, an insert of hands or an object, a frontal shot — placed at the join, it resets the audience’s map and the direction can change legitimately on the other side of it. Half of all crossed lines can be bridged this way if you have or can quickly generate a neutral.
- Use the turn you already have. Scan your selects for any moment a character turns, reorients, or the camera arcs. A visible turn authorises a direction change. Sometimes the fix is moving an existing shot earlier, not making a new one.
- Flip — with the checklist. No text, no asymmetric costume or hair details, no handedness that matters. Pass all four checks and the mirror is free footage.
- Reorder shots. Occasionally the sequence itself is the problem: swap the order of two shots and the directions reconcile, at the cost of checking the story still reads.
- Regenerate the cheapest shot, not the best one. If a regeneration is unavoidable, replace the weakest or shortest shot in the join, with direction written into the prompt in plain words and the approved neighbouring frame used as a reference. One targeted re-roll, changing only the direction wording, usually lands it.
The assembled scene, watched whole, is the only real test. Individual shots can’t be “wrong” about direction — direction only exists between shots — so this check belongs in your final sequence review, alongside lighting and drift checks. It takes one extra viewing of the finished scene with your eyes on movement and gaze instead of faces. Cheap insurance. Every time.
Screen direction and eyelines are invisible when they work and corrosive when they don’t. Plan direction on the storyboard. State it in the prompt. Guard the screen sides in conversation. And repair crossed lines with neutrals and inserts before reaching for regeneration. Your viewers will never know these rules exist. They’ll just feel that your scenes make sense. Which is exactly what the rules are for.