
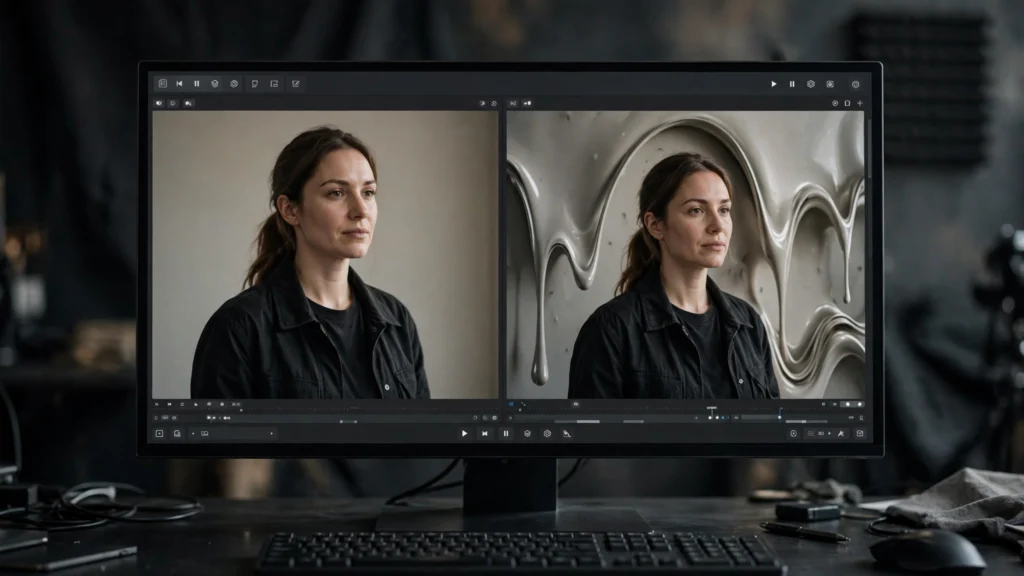
It is the cruelest pattern in AI video: the face is perfect, the performance lands, and behind the subject the room is quietly turning to soup. Door frames bend. Shelves liquefy. Paintings re-paint themselves between frames.
In our Premiere Pro finishing pass, a good performance trapped in a melting set is one of the most common rescue jobs we run. This guide covers why backgrounds melt, and the ladder of fixes — from a gentle reframe to a full set replacement — that lets the performance survive.
Why Backgrounds Melt Behind Good Faces
Understanding the cause tells you whether the edit can help. Video models spend their capacity where the prompt points: the named subject, the face, the action. Background regions get whatever capacity remains, and a region nobody described precisely is a region the model re-improvises on every frame.
Three conditions make melting worse in our experience:
- Undescribed backgrounds: a prompt that details the character and never names the setting leaves the set to chance, frame by frame.
- Complex background geometry: shelves, staircases, window grids, and tiled walls contain many straight lines and repeated elements that must agree across frames. Disagreement reads as melting.
- Parallax: when the camera moves, background layers must slide past each other at consistent speeds. Models frequently fail this, and the failure looks like the set is breathing.
The hopeful part: the failure is usually worst where the eye cares least. Viewers track faces and motion. A background that melts at the edges of frame, behind a strong performance, is often far more fixable than it looks on a paused frame — our QC pass in the AI video QC checklist deliberately reviews melting at full playback speed, because a defect nobody sees in motion is not a defect worth an hour.
Stabilise The Frame: Crops And Reframes
The first fix is also the cheapest: change what part of the frame the audience gets. Melting is rarely uniform — it concentrates at edges, corners, and distant regions, while the area around the subject stays comparatively solid.
In Premiere we scale the clip to 105–120 percent and reposition toward the subject, pushing the worst regions out of frame. On interview-style shots — a face talking against a morphing room — a modest push-in often removes two-thirds of the visible damage while making the shot feel more intimate. If the melt sits on one side, an off-center reframe keeps the subject on a thirds line and exiles the soup to the cropped-away edge.
- Animate the reframe when the shot allows: a slow push-in distributes attention toward the face and away from the set. Static crops fix geometry; moving crops redirect attention, which is stronger medicine.
- Check both orientations: a shot delivered in 16:9 and 9:16 melts in different places per crop. Fix per version, not once for all.
- Guard the resolution budget: crops beyond roughly 125 percent start costing visible sharpness, and stacking a crop under a later upscale multiplies artifacts. Spend scale carefully.
Reframing fails when the melt reaches the middle of the frame or wraps around the subject. That’s when we stop moving the frame and start hiding the set itself.
Blur And Depth: Hiding Soup Behind Focus
Real lenses already hide backgrounds — that is what shallow depth of field is for. Audiences accept a soft background instinctively, which makes blur the most natural camouflage for a melting set. Our approach is to fake the lens the generation didn’t have.
In Premiere, we duplicate the clip, mask the subject region on the top layer, and apply a Gaussian blur to the layer beneath, feathering the mask so the transition reads as focus falloff rather than a cutout. The subject stays sharp, the melt turns into bokeh-adjacent softness, and melting detail loses the definition it needs to be noticed. A blurred morph is just defocus; a sharp morph is a defect.
- Keep blur believable: moderate values convince. Heavy blur around a sharp subject reads as a sticker pasted on a backdrop.
- Track the mask on moving subjects: a static mask on a moving performance tears at the edges. Keyframe the mask path or use Premiere’s mask tracking, and feather generously to forgive small errors.
- Add grain after: a light unified grain over the composite stops the sharp subject and smooth background from feeling like different images.
This technique pairs well with the localized repair workflows in our guide to inpainting and outpainting for video — patch the worst painted region, then let focus hide the seams. Blur cannot save a background the audience must read — a shop sign, a recognizable street — but for atmosphere sets, it is our highest-success fix.
Replacing The Set Entirely: Screen And Composite Routes
When the background must be readable and is melting anyway, the honest fix is replacing it. This is the most expensive rung, so we reserve it for shots the edit genuinely depends on — the one wide establishing beat, the location the story returns to.
Two routes exist in a Premiere-centered workflow:
- Regenerate the plate, composite the performance: generate or source a stable version of the set as its own clip, then key or mask the performer from the original over it. This demands a subject cleanly separable from the background — strong subject lighting and minimal hair-against-clutter edges make or break it.
- Screen and surface replacement: when the melt is contained — a window view, a picture on the wall, a screen within the scene — we corner-pin a stable replacement into that surface and track it through the shot. Contained replacements forgive a lot because the surrounding frame anchors them.
Compositing has a discipline of its own: match grain, match light direction, and soften the subject’s edges by a hair so the composite breathes as one image. A full background replacement that ignores grain matching looks like a green-screen accident even when the key is clean.
Most melting backgrounds, though, never need this rung — it exists for the shots where cutting is not an option and blur would destroy story information.
Shortening The Shot: Editing Around The Melt
Melting is time-dependent. Most generations hold their sets for the first seconds and dissolve later — the model drifts as the clip runs. That pattern makes the humble trim one of the strongest fixes we own.
We review the shot specifically for its melt point: the frame where the background stops agreeing with itself. Then we edit to live before that point. The clip ends early and the next shot — a reaction, an insert, the reverse angle our storyboard planned — starts the new beat. Viewers never see the set fail because the film has already moved on.
- Cut on motion or dialogue: ending mid-gesture or mid-line pulls the eye forward into the next shot and off the truncated set.
- Steal seconds from the front: if the melt starts at second two but the shot’s job is done by second two anyway, the shot was simply too long. AI clips habitually outrun their story beat.
- Swap the shot’s job: a failed wide can become a brief transitional glimpse under music or narration, where its duration shrinks below the melt threshold.
This is where our storyboard-first planning pays for itself, and it is built into our prompt to final cut workflow: every important beat gets coverage, so the edit always has somewhere to go when a set gives up early.
When The Performance Itself Wanders Near The Melt
The awkward middle case: the set melts close to the subject — a doorway bending just behind a shoulder, a shelf warping within a hand’s width of the face. Crops can’t reach it, blur risks eating the subject’s edge, and cutting early might amputate the best line in the scene. This is the case that separates a careful finishing pass from a hopeful one.
Start with the least glamorous option: shrink the shot’s job. If the melting doorway is ruining an eight-second take, does the scene need eight seconds? Often the performance peaks early and everything after is the editor being greedy. Taking the three good seconds and moving on is not a compromise — it’s editing. Most scenes improve when this discipline is applied, melt or no melt.
If the seconds genuinely matter, work the boundary. A masked blur can be feathered tight against the subject if you track it patiently, and keeping the subject’s own shadow and contact points sharp sells the trick — audiences read edges and shadows far more than they read shelf geometry.
Split the difference where you can: mild crop plus mild blur usually beats either one pushed hard. Each fix at half strength hides the other’s fingerprints.
And accept the trade when the shot is the scene’s anchor: that is the one that earns a composite or a regeneration. Not every shot can be the anchor. Spend the heavy fix where the story actually stands.
Prevention: Background Discipline At Generation
Every rescue above is cheaper at generation time. When we write prompts now, backgrounds get the same discipline as characters:
- Name the set concretely: one location, a few named elements. “A small kitchen, white tiles, one window” holds; “a beautiful interior” dissolves.
- Reduce background geometry: plain walls, simple furniture, uncluttered shelves. Every straight line and repeated pattern you remove is a melt that cannot happen.
- Lock the camera for risky sets: static or slowly pushing cameras let backgrounds survive. Ask for camera movement on simple sets, and stillness on complex ones.
- Generate the set hero a plate: for a recurring location, generate an empty establishing shot first. It proves the set’s stability and gives the edit a clean plate to composite or cut to.
The melt behind a great performance feels like betrayal, but it is really a capacity bill coming due — the model spent itself on the face and improvised the room. Crop it, soften it, replace it, or cut before it fails; each rung saves performances every week in our edit bay.
And the next time you prompt, describe the room like you mean it. The set you specify is the set that stays built.
Frequently Asked Questions
Why Do Backgrounds Melt More Than Faces In AI Video?
Faces and named subjects get the model’s attention and consistency mechanisms. The set behind them is often undescribed filler that gets re-improvised every frame. Describe your backgrounds concretely and they hold noticeably better.
Can Blurring A Morphing Background Look Natural?
Yes — it reads as shallow depth of field, which audiences are trained by every film and phone portrait to accept. Keep the subject edges clean, feather the mask, and don’t overdo the strength. It should look like a lens choice, not a bandage.
Is It Better To Replace The Background Or Regenerate The Shot?
Replace it when the performance is genuinely strong and the set is one contained area. Regenerate when the melt is everywhere or wrapped around the subject — compositing costs more time than a fresh generation in that case.
How Do I Stop Backgrounds Melting In The First Place?
Name the set, simplify its geometry, and go easy on camera moves through complex spaces. Recurring locations are worth generating as an empty establishing shot first, so you know the set can hold before a performance depends on it.
Keep The Performance, Fire The Set
That is really the whole job here. The take where the actor — generated or not — actually lands the moment is precious and hard to repeat. Sets are replaceable.
So protect the performance with everything the edit has: tighter frames, honest blur, shorter cuts, and only rarely the full composite. Then fix the root cause in the prompt, because the cheapest background rescue is still the one you never have to run. Describe the room, simplify the room, and let the next performance act somewhere solid.